搜索到
17
篇与
的结果
-
 Debian之网络配置 网络配置安装debian server 版本后配置IP操作:IP设置 通过 编辑 /etc/network/interfaces 文件, 执行 service networking restart 生效设置静态IP# This file describes the network interfaces available on your system # and how to activate them. For more information, see interfaces(5). source /etc/network/interfaces.d/* # The loopback network interface auto lo iface lo inet loopback # The primary network interface auto ens33 allow-hotplug ens33 iface ens33 inet static address 192.168.1.81 netmask 255.255.255.0 gateway 192.168.1.1 # This is an autoconfigured IPv6 interface iface ens33 inet6 auto设置动态IP# This file describes the network interfaces available on your system # and how to activate them. For more information, see interfaces(5). source /etc/network/interfaces.d/* # The loopback network interface auto lo iface lo inet loopback # The primary network interface auto ens33 allow-hotplug ens33 iface ens33 inet dhcp # This is an autoconfigured IPv6 interface iface ens33 inet6 auto
 -
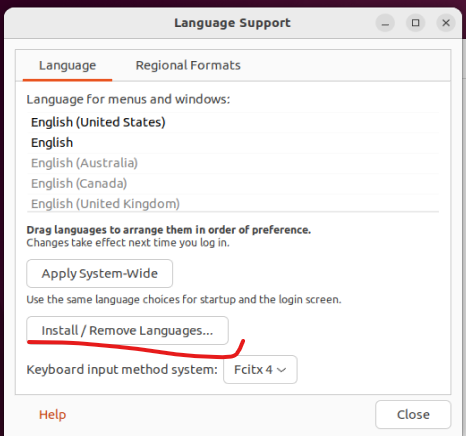
Ubuntu输入法安装 安装搜狗输入法添加中文语言支持Settings --> Region & Language --> Manage Installed Languages安装 fcitx 输入法框架 sudo apt update sudo apt install fcitx 设置fcitx为系统输入法Settings --> Region & Language --> Manage Installed Languages, 选择 fcitx设置fcitx开机启动sudo cp /usr/share/applications/fcitx.desktop /etc/xdg/autostart/安装搜狗输入法dpkg -i sogoupinyin_4.0.1.2800_x86_64.deb # 如果有报错,可以运行如下命令: sudo apt install -f # 重启电脑, 右上角的键盘图标,即可调出搜狗输入法, 配置输入法 #注意: 安装完毕后,还需要再安装一些搜狗输入法的依赖: sudo apt install libqt5qml5 libqt5quick5 libqt5quickwidgets5 qml-module-qtquick2 sudo apt install libgsettings-qt1 # 以下指令查看搜狗运行错误, 安装依赖包, 缺什么装什么 cd /var/log tail -f syslog |grep sogou
-
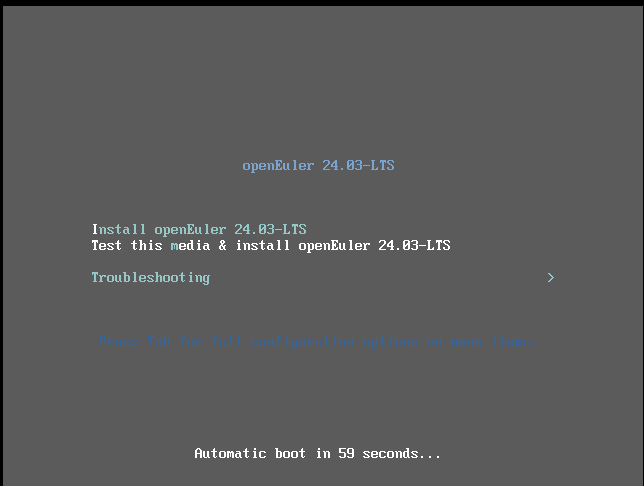
虚拟机安装OpenEuler-欧拉操作系统 前言平时使用Ubuntu和debian较多, 闲来无事安装 OpenEuler 试试准备工具:VMware WorkstationopenEuler系统镜像开始创建虚拟机此处省略虚拟机创建过程, 日后补充启动虚拟机vmware 中配置好后 启动虚拟机, 选择第一个安装选择语言安装配置,配置安装目的地, 配置软件选择 , 配置网络主机名 , 配置时区 , 用户设置安装位置(分区):默认自动分区,选择待安装操作系统的硬盘后勾选“Custom”,单击“Done”进入分区界面配置分区软件选择用户设置:启用root, 创建管理员用户开始安装安装过程重启完成安装安装 xfce系统更新 sudo dnf update 安装操作## 安装字库 sudo dnf install dejavu-fonts liberation-fonts gnu-*-fonts google-*-fonts ## 安装Xorg sudo dnf install xorg-* ## 安装XFCE及组件 sudo dnf install xfwm4 xfdesktop xfce4-* xfce4-*-plugin network-manager-applet ## 安装登录管理器 sudo dnf install lightdm lightdm-gtk ## 设置默认桌面为XFCE 通过root权限用户设置 echo 'user-session=xfce' >> /etc/lightdm/lightdm.conf.d/60-lightdm-gtk-greeter.conf ## 使用登录管理器登录XFCE sudo systemctl start lightdm ## 设置开启自启 sudo systemctl enable lightdm sudo systemctl set-default graphical.target ## 如果默认安装了gdm建议停用gdm systemctl disable gdm配置网络[openEuler配置网络](https://docs.openeuler.org/zh/docs/22.03_LTS_SP3/docs/Administration/%E9%85%8D%E7%BD%AE%E7%BD%91%E7%BB%9C.html)配置IP使用nmcli命令说明:使用nmcli命令配置的网络配置可以立即生效且系统重启后配置也不会丢失。nmcli介绍nmcli是NetworkManager的一个命令行工具,它提供了使用命令行配置由NetworkManager管理网络连接的方法。nmcli命令的基本格式为: nmcli [OPTIONS] OBJECT { COMMAND | help }其中,OBJECT选项可以是general、networking、radio、connection或device等。在日常使用中,最常使用的是-t, --terse(用于脚本)、-p, --pretty选项(用于用户)及-h, --help选项,用户可以使用“nmcli help” 获取更多参数及使用信息。nmcli help常用命令使用举例如下: ## 显示NetworkManager状态: nmcli general status ## 显示所有连接: nmcli connection show ## 只显示当前活动连接,如下所示添加 -a, --active: nmcli connection show --active ## 显示由NetworkManager识别到的设备及其状态: nmcli device status ## 使用nmcli工具启动和停止网络接口,在root权限下执行如下命令: nmcli connection up id enp3s0 nmcli device disconnect enp3s0 配置动态IP# nmcli connection add type ethernet con-name connection-name ifname interface-name nmcli connection add type ethernet con-name ens33dhcp ifname ens33配置静态IP连接# 配置静态IP # nmcli connection add type ethernet con-name connection-name ifname interface-name ip4 address gw4 address # 例如创建名为 net-static的静态连接配置文件,在root权限下使用以下命令 nmcli con add type ethernet con-name ens33static ifname ens33 ip4 192.168.1.89/24 gw4 192.168.1.1 # 还可为该设备同时指定 IPv6 地址和网关 # nmcli con add type ethernet con-name ens33static ifname ens33 ip4 192.168.0.10/24 gw4 192.168.0.254 ip6 abbe::**** gw6 2001:***::* # 设定两个 IPv4 DNS 服务器地址 nmcli con mod ens33static ipv4.dns "192.168.1.1 223.5.5.5" # 设置两个 IPv6 DNS 服务器地址 # nmcli con mod ens33static ipv6.dns "2001:4860:4860::**** 2001:4860:4860::****" ## 激活连接并检查状态 nmcli con up ens33static ifname ens33 ## 重启网卡 systemctl restart NetworkManager
-
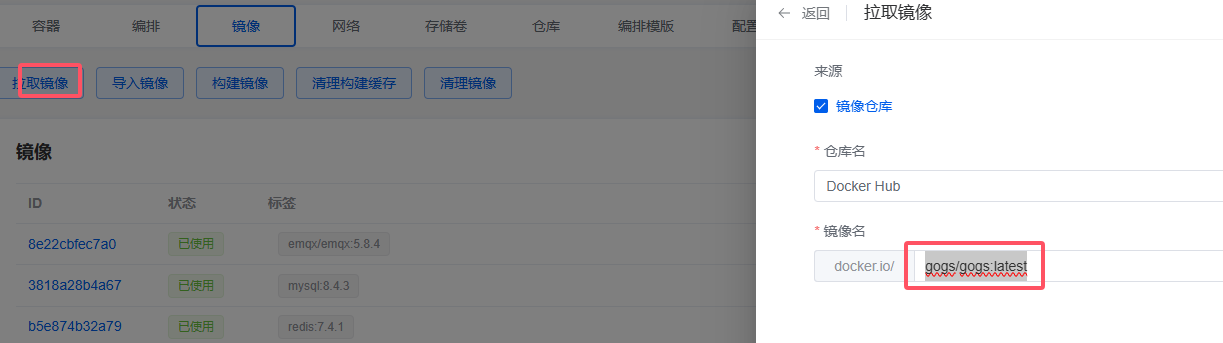
Gogs搭建与数据迁移 docker安装gogs环境Debian11, 1panel面板拉取镜像输入镜像名 gogs/gogs:latest, 点击右下角拉取出现如下图提示则 拉取成功创建容器回到 容器页面, 点击创建容器名称 : gogs, 镜像选择刚才拉取的暴露端口 22 和 3000, 此处主机22端口已被占用, 所以此处使用10022挂载数据目录/data 和 /backup 到本机 目录, 根据自己习惯选择/opt/1panel/apps/gogs/gogs/backup:/backup /opt/1panel/apps/gogs/gogs/data:/data重启规则选择 未手动停止则重启确认开始配置浏览器输入 ip:3000 访问, 会进入 install 页面注意:数据库要提前创建, 否则报错配置如上, 设置域名, 端口, 应用url, 配置管理员账户密码安装完成, 注意 domian 和 应用 url 别写错了, 不然安装完成后不会自动跳转到登录页面, 但实际安装成功, 输入正确IP即可访问
-
CSS之MP4背景动态缩放 需求项目上要求用一个视频做背景, 给到的文件是一个4k的若干秒视频,webui设计图1080p, 且没有提供个其他分辨率资料, 故根据屏幕分辨率动态缩放<template> <div class="index-root"> <div class="index-video-bg"> <video autoplay muted loop :style="getVideoScale()"> <source src="@/assets/video/bg_4k.mp4" type="video/mp4"> 您的浏览器不支持视频标签。 </video> </div> </div> </template>.index-root { display: flex; flex-direction: column; position: relative; overflow: hidden; height: 100vh; width: 100vw; justify-content: center; .index-video-bg { position: absolute; top: 0; left: 0; width: 100%; height: 100%; overflow: hidden; z-index: 0; video { min-width: 100%; min-height: 100%; width: auto; height: auto; position: absolute; top: 50%; left: 50%; transform: translate(-50%, -50%); object-fit: cover; } } }computed: { getVideoScale() { return () => { if (this.videoScale && this.videoScale > 0) { return 'transform: translate(-50%, -50%) scale(' + this.videoScale + ');'; } return ''; }; }, }, mounted() { const screenWidth = window.screen.width; const screenHeight = window.screen.height; let number1 = screenWidth / 3840; let number2 = screenHeight / 2156; if (number1 < 1.0 || number2 < 1.0) { this.videoScale = Math.max(number1, number2); } },大致流程便是如此, 实际使用还需要完善一些其他逻辑!!!